Are Die Cut Stickers Sticky?
Your die-cut sticker looks perfect in sampling. Then production starts. Corners lift, barcodes wrinkle, and operators slow down. Rework piles up and shipments slip. That pain happens when labels are treated like decoration instead of a component. We fix it with adhesive engineering and validation before full volume runs.
Yes—die-cut stickers are sticky, because “die cut” describes the shape, not the adhesive. Most use pressure-sensitive adhesive that bonds with firm finger pressure. The real question is how sticky: initial tack, peel strength, and long-term shear. We choose the adhesive based on your surface, temperature, humidity, chemicals, and whether you need clean removal on your specific substrate. Then we design the cut and delivery format so it places fast and stays stable at volume every shift.
Read on. We’ll define tack, peel, and shear, show why corners lift and bubbles form, and share a quick validation routine so you avoid rework before mass production on line.
What does “sticky” actually mean in manufacturing terms?
“Sticky” is three behaviors.
If you don’t separate them, you’ll buy the wrong label.
Tack is the instant grab.
It decides whether a label slips during placement.
Peel strength is edge resistance.
It decides whether corners lift after handling.
Shear strength is creep resistance.
It decides whether the label slides on warm plastic over time.
We also watch the rate of change.
Some adhesives grab fast but lose strength in heat.
Some start slow and get stronger after 24 hours.
We measure it, too. We run peel at a defined angle and speed. We run shear with a set load and temperature. We check after heat soak and after humidity. If the numbers drift, we redesign before you commit. That saves tooling loops every time.
When Mark asks us for “strong adhesive,” we ask back: strong for which one?
Tack, peel, or shear.
Different chemistries win different fights.
Does die cutting make a sticker more sticky?
No.
Die cutting creates geometry, not adhesion.
But geometry changes stress.
Sharp corners lift earlier.
Thin tails peel easier.
Small labels have less bonding area.
If your sticker is failing, the root cause is usually one of these:
Wrong adhesive family.
Wrong surface prep.
Wrong corner geometry.
Wrong expectation about heat and aging.
So we don’t “make it stick” by cutting it differently.
We make it stick by engineering the system: face stock, adhesive, liner, and shape.
Which surfaces cause die-cut stickers to fail most often?
The surface decides half the result.
Not the artwork.
Metal and glass are usually friendly.
Low-surface-energy plastics are not.
Textured plastics reduce real contact area.
Powder coat and matte paint can be micro-rough and inconsistent.
Mold release, oils, and fingerprints block wet-out.
If the part touches silicone, everything gets harder.
Even “clean” silicone can transfer contamination.
In practice, we define substrate clearly: material, finish, texture, and cleaning step.
If you can’t name the plastic, send a photo and a sample.
We’d rather test than guess.
Which adhesive types are common for die-cut stickers?
Most die-cut stickers use pressure-sensitive adhesive.
Acrylic systems are common for long-term stability.
They handle aging and heat better in many programs.
Rubber-based systems can feel very tacky at the start.
They can be great for fast grab.
They can also be less stable in harsh heat or UV, depending on design.
Silicone adhesives exist for special surfaces.
They are not a default.
Two details buyers forget:
Adhesive coat weight changes performance.
And liner release changes placement speed.
A sticker can be “sticky” and still fail if it’s hard to peel cleanly.
That’s why we treat liner as a process component, not packaging.
How does delivery format affect real-world stickiness on the line?
This is where production reality shows up.
If you supply loose stickers, operators touch adhesive.
Touch changes bonding.
Dust sticks.
Edges fold.
Counts drift.
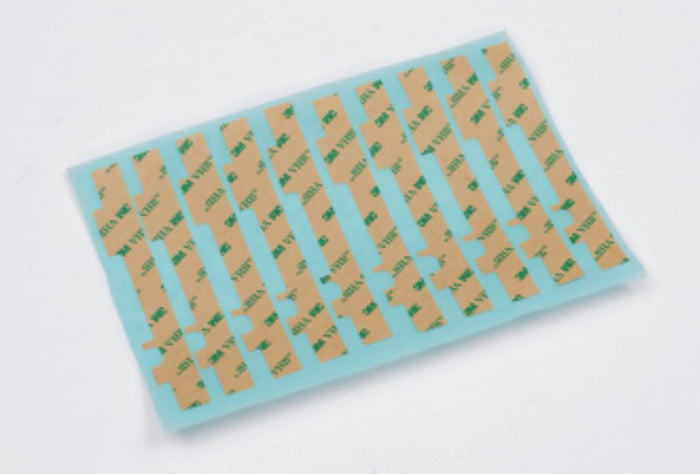
If you supply kiss-cut parts on a liner, placement becomes repeatable.
Peel-and-place is faster.
Parts stay clean.
If you supply on rolls, pitch and splice rules matter.
Bad splices stop applicators.
Wrong unwind direction creates misplacement.
If you supply on sheets, picking errors rise when parts look similar.
Kitting can solve that.
My BeeChair CEO joke is simple.
A chair that only feels good when you sit “carefully” is not a chair.
A sticker that only works when applied “carefully” is not production-ready.
Why do die-cut stickers lift at the corners after 24–72 hours?
Time reveals stress.
Corner lift usually comes from:
Surface mismatch.
Sharp geometry.
Film shrink.
Insufficient pressure at application.
Contamination that blocks wet-out.
Wet-out takes time.
It also needs pressure.
If operators apply lightly, the bond develops slowly and unevenly.
We prevent lift with boring moves:
Add corner radii.
Increase bonding land where stress lives.
Match adhesive to your substrate.
Validate after dwell time, not only immediately.
If you want a quick rule, start with corners.
If corners survive, the middle usually survives too.
How do we specify a die-cut sticker so it survives real production?
Start with the job.
Branding, identification, tamper, masking, or protection.
Then define reality:
Substrate and finish.
Environment.
Application method.
Removal requirement.
Then define the delivery format.
Roll direction, core size, pitch, splice rules, and labeling.
Format is not packaging.
Format is takt time.
Finally define cosmetics.
What counts as a bubble.
What counts as a scratch.
What lift is unacceptable.
If you don’t define it, you’ll argue later.
How do we test “stickiness” before ordering 50,000 pieces?
We test like production, not like a desk.
First: placement speed.
Seconds per unit, at real shift pace.
Second: dwell time.
Check now, then after 24 hours, then after 72 hours.
This catches lift and creep early.
Third: stress exposure.
Heat if your product runs warm.
Humidity if storage is damp.
Light chemicals if customers wipe the surface.
If removability matters, we test removal after aging.
“Clean today” can become “residue tomorrow.”
Are die-cut stickers permanent by default?
No. We can make them permanent, removable, or repositionable. Adhesive selection decides this.
Do die-cut stickers stick better than regular stickers?
Not automatically. Die cut means custom shape. Adhesion depends on adhesive chemistry, surface prep, and environment.
Why do stickers leave residue?
Wrong removability design, heat exposure, or late removal. If rework is expected, specify it and validate it.
Can die-cut stickers work on low-surface-energy plastics?
Yes, but we must engineer for it. Substrate, adhesive, pressure, and time must match.
What should you send Sanken for a fast recommendation?
A photo of the application area, substrate type, temperature range, target volume, and whether you need clean removal.
Conclusion
Yes, die-cut stickers are sticky—but “sticky” is tack, peel, and shear, and it depends on your surface and environment. Define the job and conditions first, then validate after time. That’s how we keep labels boring at volume.