
What Are the Key Steps in the Injection Moulding Process?
Injection moulding is one of the most widely used manufacturing processes for producing plastic components at scale. From automotive parts and consumer electronics to medical devices and industrial products, injection moulding offers high precision, repeatability, and cost efficiency for mass production.
However, many product quality issues—such as warpage, sink marks, short shots, flash, and dimensional inconsistencies—can often be traced back to problems within the moulding process itself. Understanding the key steps of injection moulding helps OEM manufacturers improve product quality, reduce defects, and optimize production efficiency.
The injection moulding process typically consists of six main stages: mold clamping, material injection, packing and holding, cooling, mold opening, and part ejection. Each stage must be carefully controlled to ensure consistent part quality and stable production performance.
Why Understanding the Injection Moulding Process Matters
Successful injection moulding is about much more than simply injecting molten plastic into a mold.
Every stage affects:
- Product quality
- Cycle time
- Production efficiency
- Material usage
- Mold lifespan
- Manufacturing costs
A well-controlled process ensures reliable production and minimizes scrap.
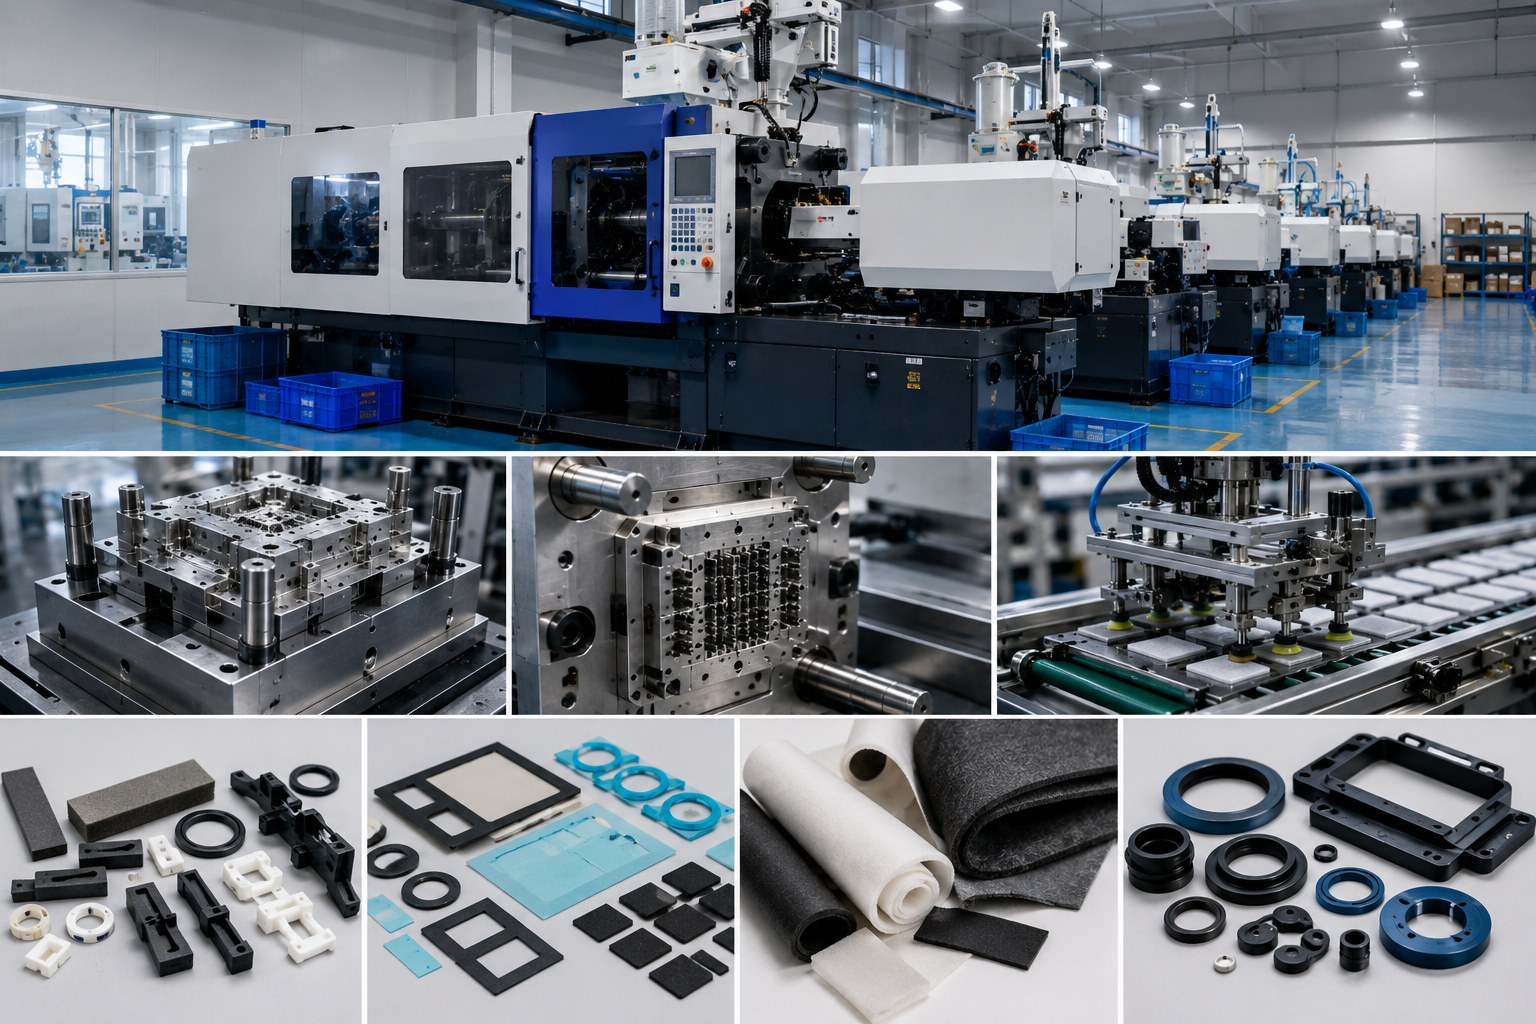
Theme: Precision Injection Moulding Production
Step 1: Mold Clamping
The process begins by closing the two halves of the mold.
Before injection starts:
- The mold must be fully aligned
- Clamping force must be sufficient
- The mold cavity must seal properly
The injection molding machine applies significant clamping pressure to prevent molten plastic from escaping during injection.
Insufficient clamping force may cause:
- Flash defects
- Dimensional variation
- Surface imperfections
Proper mold design and machine selection are critical at this stage.
Step 2: Plastic Material Injection
Once the mold is closed, plastic pellets are fed into the machine barrel.
Inside the barrel:
- The material is heated
- A rotating screw melts the plastic
- The molten material is mixed uniformly
The screw then pushes the molten plastic into the mold cavity under controlled pressure.
Important parameters include:
- Melt temperature
- Injection speed
- Injection pressure
- Material viscosity
Incorrect settings can lead to short shots, burn marks, or incomplete filling.
Step 3: Packing and Holding
After the cavity is filled, additional pressure is applied.
This stage compensates for material shrinkage as the plastic begins cooling.
Packing pressure helps:
- Improve dimensional accuracy
- Reduce sink marks
- Maintain surface quality
- Ensure complete cavity filling
Holding time varies depending on:
- Material type
- Wall thickness
- Part geometry
Proper control during this phase greatly influences final product quality.
Step 4: Cooling
Cooling is typically the longest portion of the injection moulding cycle.
During cooling:
- The plastic solidifies
- Internal stresses stabilize
- The part gains structural strength
Cooling channels inside the mold help remove heat efficiently.
Factors affecting cooling time include:
- Material type
- Part thickness
- Mold temperature
- Cooling system design
Optimized cooling can significantly improve production efficiency.
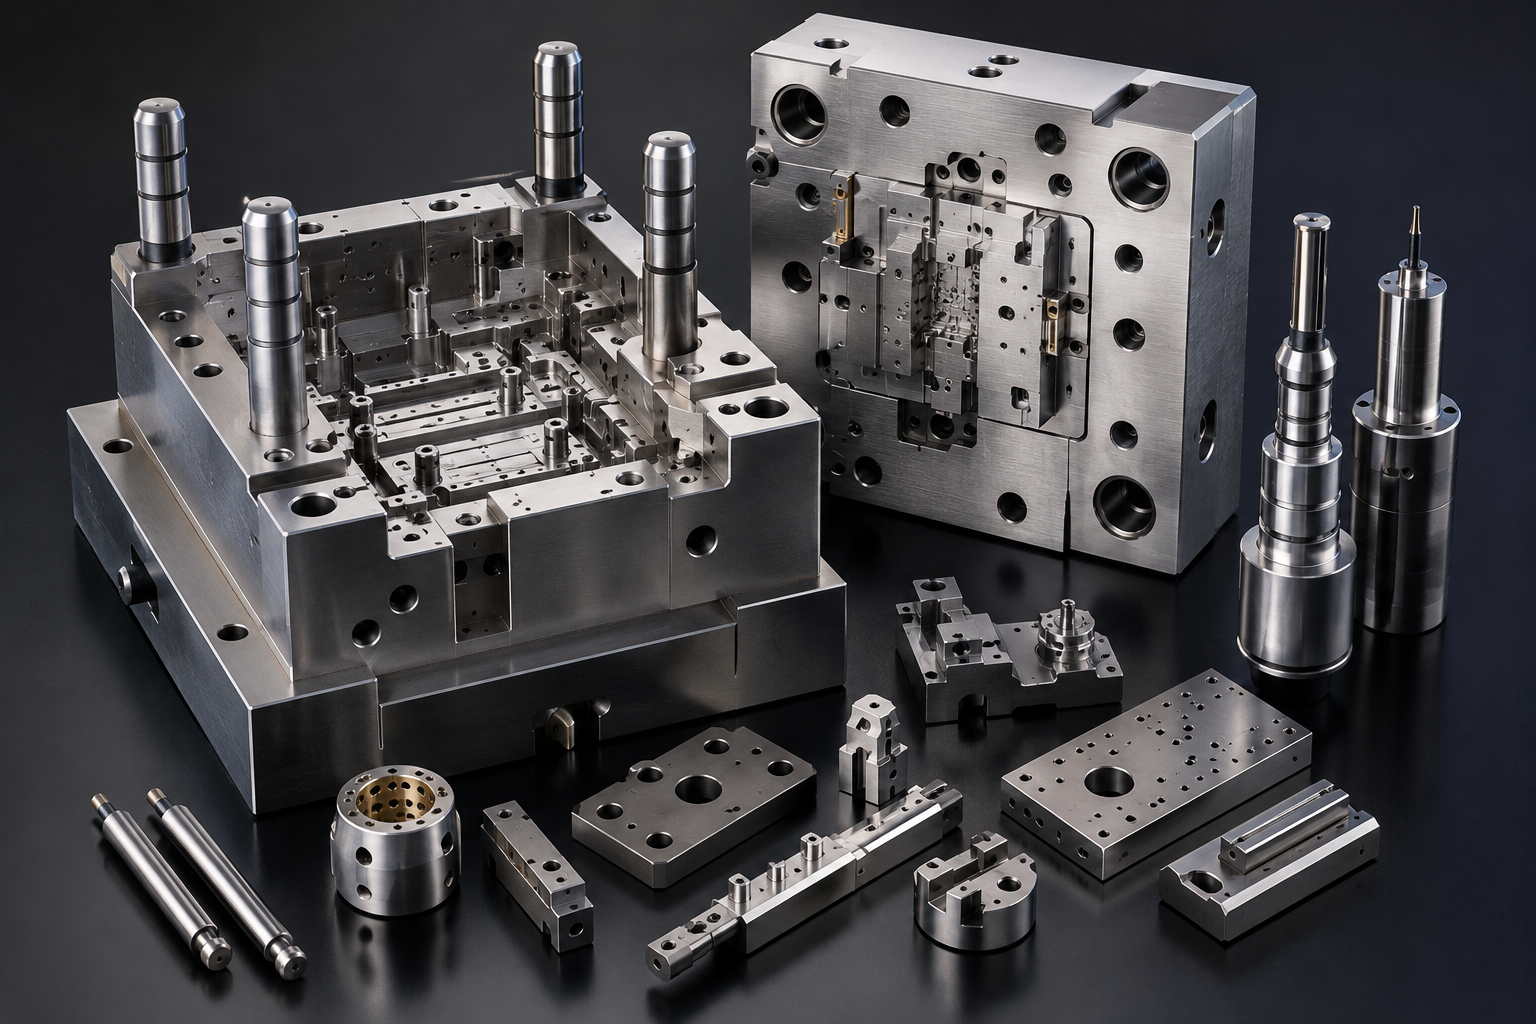
Theme: High-Precision Mold Components
Step 5: Mold Opening
After the part has cooled sufficiently, the mold opens.
The two mold halves separate carefully to expose the finished component.
At this stage, the part must:
- Maintain dimensional stability
- Release cleanly from the cavity
- Avoid deformation
Proper draft angles and mold design help ensure smooth release.
Step 6: Part Ejection
Ejector pins or mechanical systems push the molded part out of the mold.
A successful ejection process prevents:
- Surface damage
- Stress marks
- Cracking
- Distortion
Once ejected, the part may proceed to:
- Inspection
- Assembly
- Secondary processing
- Packaging
The mold then closes again, and the cycle repeats.
Secondary Operations After Injection Moulding
Many products require additional manufacturing steps.
Common secondary processes include:
- Trimming
- Ultrasonic welding
- Pad printing
- Painting
- Assembly
- Precision die cutting
- Adhesive application
For OEM projects, integrating these operations can reduce production costs and simplify supply chain management.
Common Defects During Injection Moulding
Understanding the process helps prevent common quality issues.
| Defect | Typical Cause |
|---|---|
| Flash | Insufficient clamping force |
| Short Shot | Poor cavity filling |
| Sink Marks | Insufficient packing pressure |
| Warpage | Uneven cooling |
| Burn Marks | Excessive injection speed |
| Weld Lines | Poor material flow |
Proper process control minimizes these risks.
How Sanken Manufacturing Supports Injection Moulding Projects
Dongguan Sanken Electronics Manufacturing Co., Ltd. provides custom precision manufacturing solutions for OEM customers worldwide.
Our capabilities include:
- Plastic injection molding
- Precision mold development
- Precision die cutting
- Foam converting
- Rubber sealing products
- Adhesive component manufacturing
- Material laminating
Key Advantages
- OEM and ODM customization
- ISO 9001 quality management
- RoHS and REACH compliant materials
- Domestic and overseas production bases
- Cleanroom precision manufacturing
- Tool development from customer drawings or samples
In addition to injection molding, Sanken specializes in automotive NVH insulation components, precision die-cut materials for consumer electronics, and custom rubber sealing products.
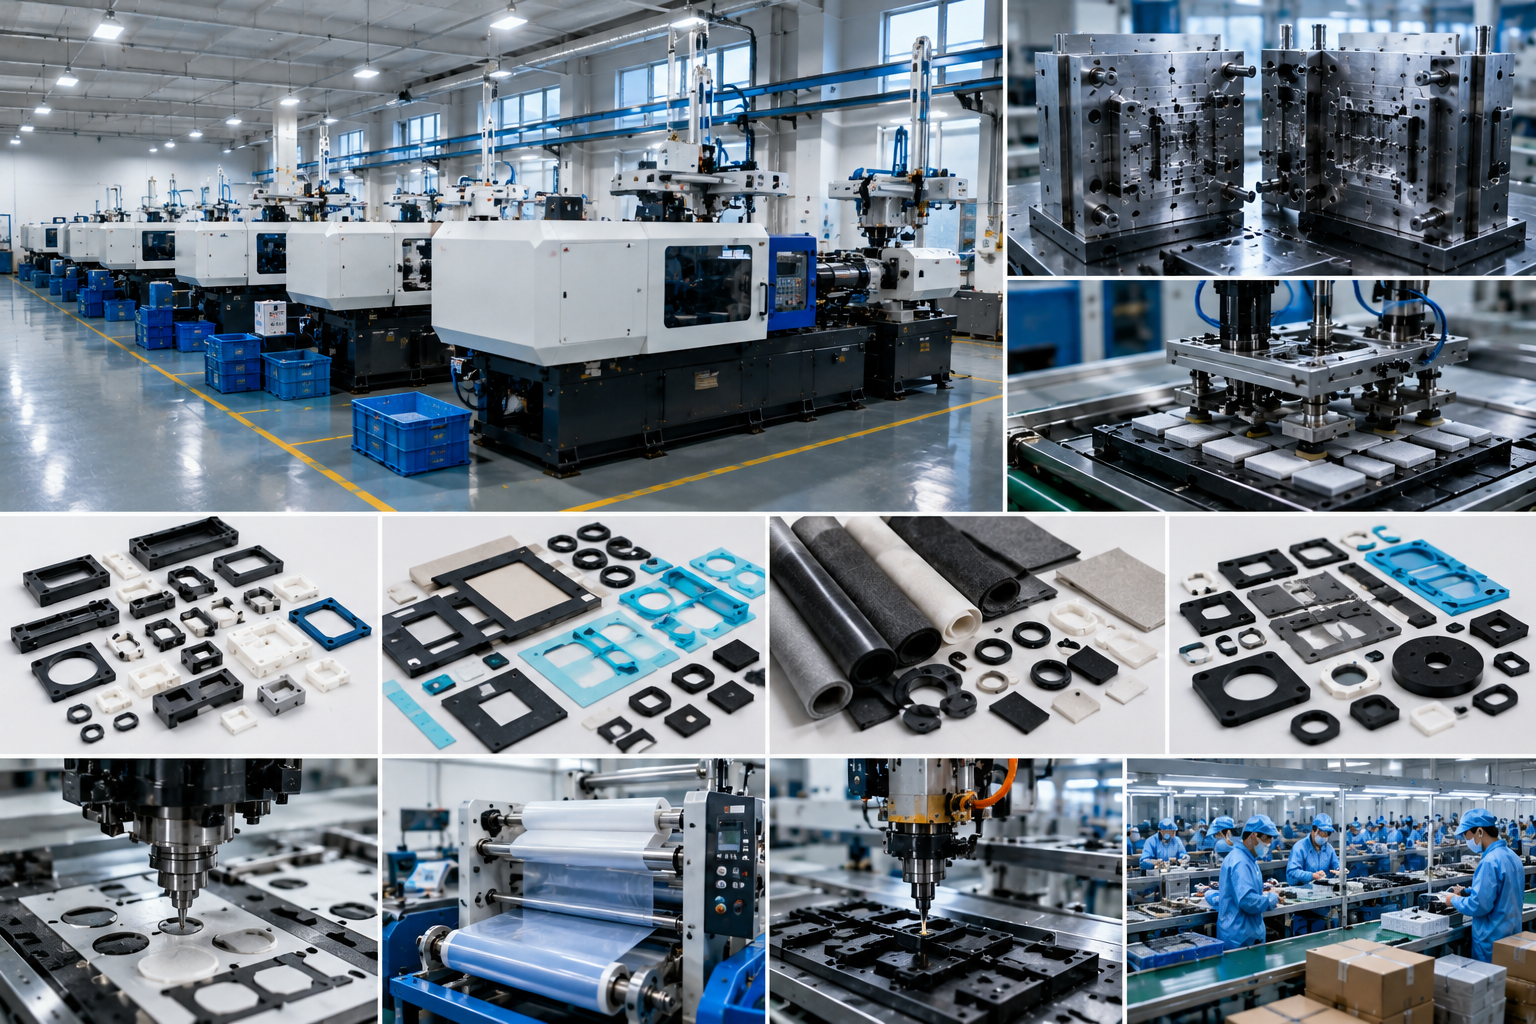
Theme: Custom OEM Manufacturing Solutions
Tips for Selecting the Right Injection Moulding Partner
When evaluating suppliers, consider:
- Engineering expertise
- Mold design capability
- Quality management systems
- Material knowledge
- Production capacity
- Secondary processing support
A capable manufacturing partner can help optimize both tooling and production efficiency.
Featured Snippet Summary
The key steps in the injection moulding process are mold clamping, material injection, packing and holding, cooling, mold opening, and part ejection. Each stage plays a critical role in determining product quality, dimensional accuracy, cycle time, and overall manufacturing efficiency.
Conclusion
Injection moulding is a highly efficient manufacturing process that produces precise plastic components through a series of controlled stages. By optimizing clamping, injection, cooling, and ejection, manufacturers can improve product quality and reduce production costs.
For OEM companies seeking custom injection molding, precision die cutting, and integrated manufacturing solutions, working with an experienced partner such as Dongguan Sanken Electronics Manufacturing Co., Ltd. helps ensure reliable production and long-term product success.